How to make a Black and White print
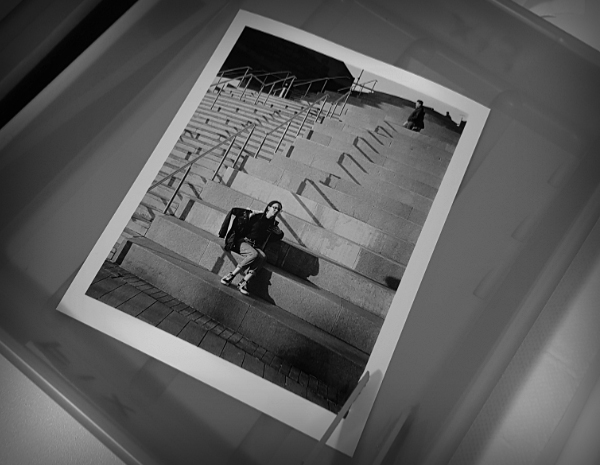
The following explains the practical procedures of how to print a BW negative (developing your BW film is covered in BW Film Processing) using VC or variable contrast paper.
VC paper is often simply referred to as 'multigrade' taken from the Ilford brand name.
Before going further, if you are new to mixing chemicals or are unsure about the procedure in any way please read my article How to mix chemicals before continuing.
OK, before we get to the detail, let's take a quick look at the steps involved in making a black and white print.
Overview of Procedures
- Prepare working areas
- Set easel to desired print shape/size
- With negative inserted, set enlarger to obtain desired print size
- Using tests, determine exposure for the high values (light tones) of the image
- Using tests, determine the overall contrast and depth of tone for the darker areas of the image
- Assess a full 'work' print to determine any local tonal adjustments (known as dodging & burning)
- Make final print with correct exposure, contrast, and any local adjustments
OK, let's put this into practice by making a print...
Equipment checklist:
- Enlarger, enlarger timer, focus finder, print easel.
- Set of multigrade printing filters (or enlarger with colour head). The filters can be either the above or below the lens type. I will assume we are using the below the lens type since they are usually easier to use in practice.
- Piece of 10x8 or A4 black cartridge paper (or thin black card).
- Minimum of three, ideally four, print processing trays (one each for dev, stop, fix, wash).
- Set of 3 print tongs.
- Process timer or clock/watch (to time development etc.
- Black and white printing paper of your choice.
- Scissors to cut print paper into test pieces.
- Blower brush to remove dust from negs and neg carrier.
- Wooden pegs or print clips on a cord over the sink to hang prints to dry (or use a print drying rack e.g. made by Paterson).
Preparing your work space:
Darkrooms traditionally have a 'wet side' and a 'dry side'.
The wet side is where the processing chemicals are mixed and then put in trays ready for use.
The dry side is where the enlarger, other electrical bits, and your negatives and printing paper are kept safe.
Always keep the dry side dry!!
- Prepare the ‘wet side’ by arranging the processing trays/dishes as desired in a sink or on a flat work table. It is traditional and easy to work from left to right with trays in the order; Dev, Stop, Fix, Wash but you can choose your own workflow. It is also good practice to label each tray with the chemical type e.g. 'DEV' using a permanent black marker, and always use the same chemical in the designated tray.
- Mix each processing chemical at 20 degree C (to speed things up when mixing from powder, use water at 40 degrees C and cool the mix down before using. This helps the powder crystals to dissolve easier.) Place each chemical in the relevant marked tray. In 10x8 inch trays, a minimum of 500ml of working solution is required for 10x8 inch prints.
- Prepare the ‘dry side’ by cleaning the enlarger (dust is your enemy when printing!) and negative carriers (choose carriers specific to the negative format if possible e.g. 35mm, 6x7, etc.) Switch everything on and check all is working properly i.e. your timer is working, the lens aperture is working, the bulb in the enlarger is working.
Preparing your enlarger and negative:
- Start by preparing the enlarger. Make sure you have the correct negative carrier for your film format i.e. 35mm or 120, and the correct lens fitted to the enlarger. For 35mm negs use a 50mm lens and for 120 6x6 negs an 80mm lens (90mm for 6x7 negs). For 4x5 use a 150mm. You can see that the focal length for the enlarger lens is the same as the ‘standard’ camera lens.
- Put your chosen negative in the carrier and before inserting the carrier into the enlarger, make sure there are no bits of dust on either side of the negative. Use a blower brush to clear away any dust. If the carrier has glass in it, make sure the glass is clean and dust free and dust off the negative before placing in the carrier – then do a final check before inserting in the enlarger! A few extra seconds spent doing this will save hours of ‘spotting’ white marks off of your prints later – trust me! Tip: Put the negative in the carrier so the image will be the right way around when looking at it on the enlarger easel. This often means putting the neg in the carrier the 'wrong way around'.
- Set the enlarger easel to the print size you want e.g. 10x8, remembering to allow for any border. Since 35mm negs don’t fit the shape of 10x8 prints (or when doing a narrow crop from 120 negs) it is a good idea to have an equal border around the top and sides of the print image and a wider border under the image. This allows the image to ‘sit well’ on the paper.
- Turn off the room lights and switch the enlarger on. Raise the enlarger and roughly adjust the focus until you have the area of the negative you want in your print at the desired size.
- If necessary, re-adjust the easel to the correct shape/format.
- To ‘fine focus’ the image, place a scrap piece of print paper on the easel under the focus finder and focus on the grain of the image. It is not good enough to just ‘eye ball’ the image on the easel – use a grain focus finder!
- Make any final adjustments to the easel and cropping.
- Place the Grade 2 multigrade filter in it's holder below the enlarger lens. Although unfiltered enlarger 'white light' gives the equivalent of grade 2 on VC paper (I know it does on Ilford Multigrade IV and V because I have tested it!) using the actual grade 2 filter gives us an advantage as described later. Note: If you are using an enlarger with a colour head refer to the colour head filter values chart for your printing paper and set the Yellow and Magenta filter values for a Grade 2 contrast.
You are now ready to make your first test strip at Grade 2 following the 'Standard Test Strip Method'!
Remember there are two basic stages to obtaining your first ‘work print’ from a new negative:
- find the best exposure time, and
- adjust the contrast.
Don’t try to do both at the same time because any change to the exposure time will alter how the contrast looks; equally a change to the contrast may require an adjustment to the exposure time!
Finding the print exposure time
Continuing from above, with the enlarger ready for printing your negative, it's time to make the first exposure test:
- With the room lights off, and the safelights on, cut a piece of printing paper into 4 pieces (if using 10x8 paper, I recommend cutting the sheet into 4 2.5inch wide strips - that is cut the sheet with the long edge at the top/bottom). Hold on to one strip and put the rest back in the protective box/packet with the other sheets.
- Place the unexposed strip of print paper on the easel where the important high values of the image will be projected.
- Close the lens aperture by 2 or 3 stops and set the enlarger timer to 4 seconds.
- Press the timer 'start' button to expose the full strip of print paper for 4 seconds.
- Using your black paper/card, cover one quarter of the strip to protect it from any additional enlarger light and press the timer 'start' button a second time to expose for another 4 seconds.
- Change the enlarger timer to 8 seconds, move the black card so it covers half of the strip, and exposure for 8 seconds.
- Now change the enlarger timer to 16 seconds, move the black card so it covers three-quarters of the strip, and exposure for 16 seconds. Note: The strip of paper has now received accumalative exposures of 4s, 8s, 16s, 32s. The first quarter received 4s, the next 4+4=8s, the third 4+4+8=16s, and the last 4+4+8+16=32s. Each successive step on the strip received one stop more exposure than the previous step. This gives us a good starting range of exposures for the first test.
- A good habit to have is to write the exposure information on the back of each test you do. In this way, you can keep track of your changes and also be able to go back a step of two if needed. Write #1 and 4/8/16/32s together with the lens aperture value on the back of the paper.
Processing the test...
- Now process the test by gently placing the strip of paper face down into the developer tray and use the print tongs to submerge the paper.
- Start the process timer (use a dedicated timer or a clock/watch) and gently agitate the paper in the solution by constantly turning it over and over. Develop the test for the same time you will develop the final print which is usually a minimum of 1.5mins for RC (resin coated) paper and 2mins for FB (fibre paper). Note: I do not teach or advise the use of 'tray rocking' to agitate prints. The only time I let the tray rock is as I am inserting a full print into the tray and I want the developer to flow rapidly over the whole paper. To achieve that, I slightly lift the front of the tray so the solution gathers at the far end. I then insert one end of the print into the solution and as I lower the front of the tray to allow the solution to flow back, I keep the paper going into the tray. The whole thing takes only a couple of seconds. Once the paper is fully immersed in the solution, I do the 'turning over' method for the required time and for each tray.
- Around 5/10 secs before the end of the development time, use the dev tongs to lift the paper out of the solution and allow it to drain for a few seconds, then quickly drop it into the stop bath tray and return the dev tongs back to the dev tray. Use the stop bath tongs to submerge the paper, reset and start the process timer, and again agitate by turning it over. The stop bath acts almost instantly so the paper only needs to be in the solution for around 20-30secs.
- After 20-30seconds, lift the paper from the stop bath, allow to drain for a few seconds, and drop it into the fixer tray. Again, cjhange tongs, and submerge the paper in the fix solution then reset and start the clock. Fix the test for 30secs after which time you can turn the room lights on again. Full fixing requires 2-5mins depending on the paper used (RC or FB) so follow the times recommended by the fixer producer.
- Since this is only a test, fix for about 1min and then rince in the water tray to remove excess fixer. Remove the excess water from the paper with a squeegee or your hand then it's time to assess the test.
Assessing the test strip
Once you have made a test strip in the way described above you will have a strip showing 4 different steps with each step getting lighter or darker than the previous step (depending on which way you move across the test!)
Let’s assume the lightest step is at the left and darkest at the right. Look at the image on each step and eliminate the obviously too light and too dark steps. Hopefully, these will be the first and last steps.
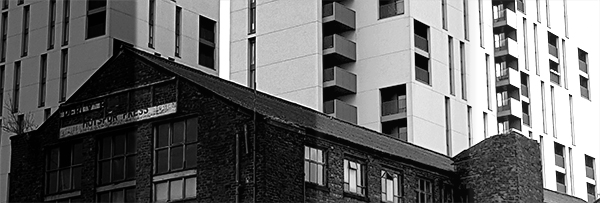
Note: If all of the steps are too light, repeat the test but increase the exposure time sequence to 6, 6, 12, 24secs. If everything is too dark, close the lens aperture one more stop and repeat the test with the original times e.g. 4, 4, 8, 16secs.
Assuming we have a good test strip, look at the remaining two steps and decide which looks best (it won’t usually be exactly right at this stage but one will usually look better than the other). If it is the second step, which received 8secs of exposure, we know the exposure time is around this time. If the second step still looks too light and the third too dark, we know the correct time is between 8 and 16secs. So we can now make a second test strip using a modified time sequence.
The second test strip will have times of 8, 9.5, 11.3, 13.4secs.
- Make the second test strip in the exact same way with a new piece of print paper, but start with the timer set to 8secs for the first quarter exposure, followed by resetting the timer to 1.5secs for the second exposure step, 1.8s for the third, and 2.1s for the final step.
- Write #2 and the new exposure data on the back of the test before processing.
- Process the second test in exactly the same way as the first (we are looking for consistency in the processing - always do it the same way). The steps in this second test differ by one-quarter of a stop exposure so the changes you see in the light tones will be subtle. Assess each step as you did for the first test to find the step that gives you the tone you want in the lightest areas of the image. If the light tones look right to you that is the exposure time you need for the print.
As mentioned, the steps of this second test only differ by one-quarter of a stop exposure time but you may decide that the best light tones still seem to be between two of the steps. In that case, the times are so close just pick a time between the two steps. For example, if step 2 of the test (9.5s exposure time) is just still too light for you, but the third step (11.3 exposure time) is just too dark, then choose 10 seconds as the exposure time between the two steps.
The exposure time found for the important light tones for this image, at this print size, is called the 'base exposure time'
Making a 'Test Piece'
Now you have the exposure time for the lightest important tones establised, we make a 'test piece' (a test using just the one best exposure time)so we can see the tones better and to take our first look at what the darker tones are doing i.e. the print contrast.
- Set the enlarger timer to the base exposure time you have established from test strip number 2 e.g. 10 seconds.
- Place a fresh piece of print paper on the easel. Place the paper so it will show both the high values you have been testing and an area of important shadows (if one piece of paper isn't big enough, no worries, just use two pieces. One placed where the light tones are and the other where the darker tones are then expose both for the same time and process them together).
- Expose the paper for the base exposure time and process it as before.
- Assess the light tones of the test to make sure you are still happy with them. If not, then make a fine-adjustment to the base exposure time and do the test again. Note: It is important to get the base exposure time as accurate as possible before working on the print contrast so take your time; don't rush this first part.
Finding the print contrast grade
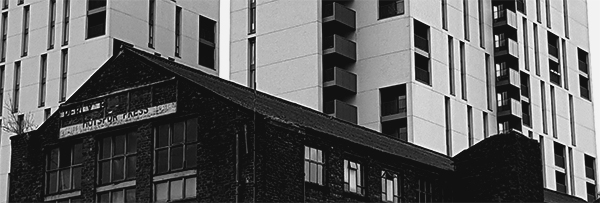
Since we have been making the tests using a grade 2 filter (or using YM values in the colour head), and because we have based our exposure time for the print on the lighter tones, when we change the contrast filter higher or lower the exposure time should stay more or less correct to maintain the lighter tones where we have placed them.
This 'constant exposure' is the great advantage I mentioned at the start but only really works if you base your exposure time on the lightest values of the image. I don't have room to go into the 'why' of this in this article.
OK, you now have your grade 2 test piece(s) showing nice high values so it's time to take a first assessment of the darker tones of the image.
Remember that to alter the print contrast we use the different contrast grades of the non-VC paper (referred to as 'fixed grade' paper) or the filters (or enlarger colour head) for VC-variable contrast or multi-grade paper.
- On the ‘grade 2 test piece’ examine the tone and depth of the shadows of the image. If the shadows look ‘weak’ i.e. too light, then you need to increase the contrast by using a higher grade number. Conversely, if the shadows look too dark and ‘depressed’ (lacking in detail) then you need less contrast by changing to a lower filter grade number. Contrast change is usually an experimental process requiring you to make new test pieces as you change the contrast filters (or colour head values).
- If the dark tones look too light change the contrast filter below the lens from grade 2 to grade 3. If they look too dark, change the filter from grade 2 to grade 1. Now make a new test piece using the same 'base exposure time'.
- Process the test in the usual way and compare it to the original grade 2 test. Are the darker tones now how you want them to be?
- Repeat this contrast filter change and test procedure until you are happy with the dark tones of your print image.
- Once you feel that the image tones/contrast are what you want, go ahead and produce a first full ‘work print’.
From this work print you can determine if further refinements to the basic exposure/contrast are required and also start to look where the image might be improved with dodging (making areas of the image lighter) and burning (making areas darker).
Make small tests of any dodging and burning and then further work prints until you are satisfied you have the image looking the way you want it.
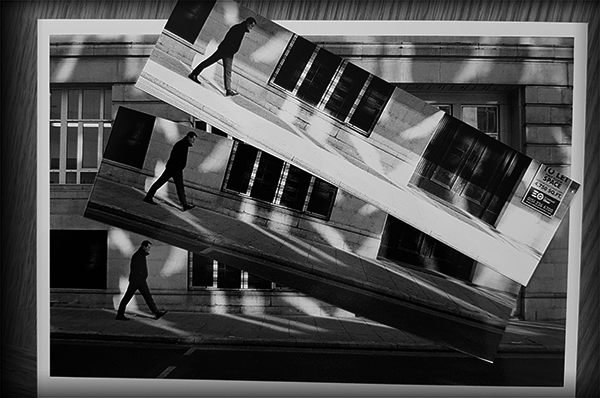
The final print will have the exposure and contrast you want for the overall tonal values in the print and also any local dodging and burning.
Congratulations you have a final print!
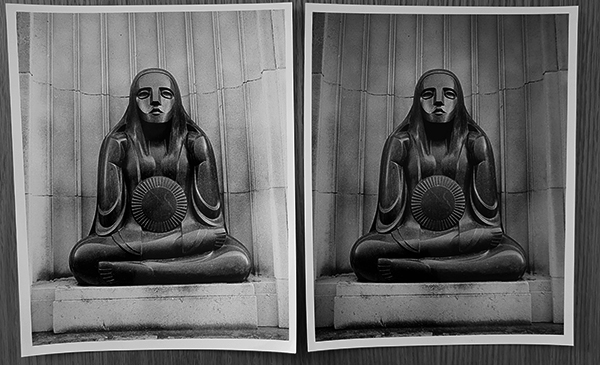
On the left is the work print with the desired exposure and overall contrast. On the right the final print with all dodging and burning applied.