How to make a Contact Sheet

The following explains the practical procedures of how to make a 'Contact Sheet'.
You will need to mix chemicals to process prints so if you are new to mixing chemicals or are unsure about the procedure in any way please read my article How to mix chemicals before continuing.
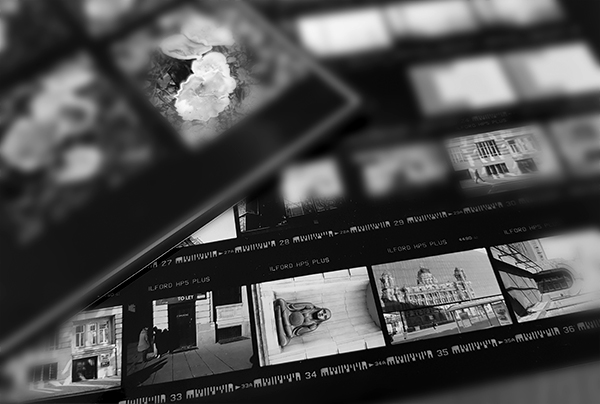
A contact sheet (sometimes also called a 'proof' sheet) is a visual record of a roll of black and white (or colour) film negatives printed onto photographic paper. The contact sheet acts as a catalogue of your negatives as well as a means to assess the individual images on a roll of film.
Once you have a contact sheet you can save time before going into the darkroom to print by making some creative decisions such as:
- Decide which images are worth printing.
- Determine the tonal values of an image which helps you decide what contrast grade you might need when printing the image.
- Decide how you may want to crop the image.
- Decide any dodging and burning that might be needed for the print.
Making contact sheets is an important part of the analogue photography process and should ideally be done for each newly processed film. The time you save in the darkroom by assessing the contact sheet first, and having a positive record of the negative images as a catalogue for the future, far outweighs the time it takes to make the actual contact sheet.
For those without an enlarger setup, you can make contact sheets using a simple light source and a clock. In fact, the great Edward Weston did a lot of his masterful contact prints from 10x8 negatives just using a single bare bulb suspended over his work bench and a metronome to count the times.
Equipment checklist:
- Enlarger, enlarger timer (or other light source and timing method).
- A piece of glass/clear acrylic big enough to easily cover a 10x8inch sheet of print paper, or a dedicated 10x8 contact printing frame.
- Piece of 10x8 or A4 black cartridge paper (or thin black card).
- Minimum of three, ideally four, 10x8 inch or bigger print processing trays (one each for dev, stop, fix, wash).
- Set of 3 print tongs.
- Process timer or clock/watch (to time development etc.)
- Black and white printing paper of your choice (for contacts it is easiest to stick to 'multigrade rc glossy' used unfiltered at grade 2).
- Scissors to cut print paper into test pieces.
- Wooden pegs or print clips on a cord over the sink to hang prints to dry (or use a print drying rack e.g. made by Paterson).
Preparing your work space:
- Prepare the ‘wet side’ by arranging the processing trays/dishes as desired in a sink or on a flat work table. It is traditional and easy to work from left to right with trays in the order; Dev, Stop, Fix, Wash but you can choose your own workflow.
- Mix each processing chemical at 20 degrees C. Place each chemical in the relevant marked tray. In 10x8 inch trays, a minimum of 500ml of working solution is required for 10x8 inch prints.
(If you are unsure about how to mix chemicals please go and first read my article How to mix photo chemicals.) - Prepare the ‘dry side’ by cleaning the enlarger (dust is your enemy when printing!) and negative carriers.
Switch everything on and check all is working properly i.e. your timer is working, the lens aperture is working, the bulb in the enlarger is working.
Making a contact sheet
- With the room lights off and the safelights on, clear the enlarger baseboard, and raise the enlarger head (with an empty negative carrier inserted) to a height that produces an area of light on the baseboard about an inch more than the size of 10x8 print paper (it is traditional to make contact sheets on 10x8 grade 2 paper but you can do whatever works best for you).
- Focus the edge of the area of light, and close the lens aperture 2 or 3 stops down.
- Since we are using the enlarger baseboard, it can be very helpful to use tape to mark where the edges of the light are so you can easily position the paper in the centre later.
- Once the enlarger head is positioned, switch the enlarger light off and, with the safelights still on (and room lights off), cut a sheet of 10x8 print paper into strips to use for making tests.
For 10x8 paper, with the long edge at the top/bottom, cut the sheet into four strips across the short side. This gives you four strips of around 2.5x8inches. - Put one strip in the centre of the enlarger baseboard with the long edge of the strip running left to right and put the rest back in the light proof box/wrapper (always make sure your print paper is properly safe in it’s box!)
- For 35mm film use two strips and for 120 film one strip of what look like the best exposed negatives and place on top of the paper strip with the shiny side of the negatives upward (dull side goes in contact with the print paper).
Cover the negatives and paper with the glass/acrylic sheet so it presses them flat. - Set your enlarger timer to 4secs and expose the whole neg/paper test strip.
- Use your black card and cover one quarter of the test strip lengthwise i.e. parallel to the long side (from top or bottom – your choice). Have the card in contact with the glass/acrylic or as close as possible to obtain a sharp edge on the test between the steps.
- Expose the paper again for another 4secs.
- Move the black card to cover half the width of the strip, set the timer to 8secs and expose again.
- Finally, cover three-quarters of the strip width, set the timer to 16secs and make the fourth and final exposure.
You now have a strip of print paper that has received four different exposures in the sequence: 4, 8, 16, 32secs.
Always start your first test strip with this time sequence. The idea is to ‘surround’ the correct time and work in from the lightest and darkest steps by adjusting the time sequence for subsequent test strips. - Process the strip for the chemical manufacturer's recommended times.
With resin-coated paper in Multigrade developer this would be:
- 1 minute dev...
- 30 seconds stop...
- 1 minute fix depending on dilution...
- Finish with 2 minutes wash in running water
For test strips, as long as the development is for the correct time, don’t worry about exact fixing and washing, we want to assess the test!
Also, don’t be tempted to ‘snatch’ the test from the dev if it looks like it is going too dark. Tests and prints always look darker under safelight conditions! Just process it for the full dev time and assess it when the white room lights are on.
Once the test has been rinsed, use a squeegee to remove excess water from both sides ready for assessment. - Check your print paper box is closed, then switch on the room lights to assess your test.
Assessing the test strip
- Once you have made a test strip in the way described above you will have a strip showing 4 different steps with each step getting lighter or darker than the previous step (depending on which way you move across the test!)
- With the test paper held vertically, let’s assume the lightest step is at the left and darkest at the right. Look at the images on each step and eliminate the obviously too light and too dark steps.
Hopefully, these will be the first and last steps. (If all of the steps are too light, repeat the test but increase the exposure time sequence to 6, 6, 12, 24secs. If everything is too dark, close the lens aperture one stop and repeat the test with the original times e.g. 4, 4, 8, 16secs.) - Assuming we have a good test strip, look at the remaining two steps and decide which looks best (it won’t usually be exactly right at this stage but one will usually look better than the other). If it is the second step, which received 8secs of exposure, we know the exposure time is around this time. If the second step still looks too light and the third too dark, we know the correct time is between 8 and 16secs. So we can now make a second test strip using a modified time sequence.
- The second test strip will have times of 8, 10, 12, 14secs.
- Make the second test strip in the exact same way but start with the timer set to 8secs for the first exposure, followed by resetting the timer to 2secs for each of the following exposure steps.
- Process the second test and assess each step as you did for the first test. If most of the images on one of these steps looks right to you that is the time you need for the contact sheet.
Note: When contact printing several strips of negatives, if your negatives are of vastly different densities (i.e. some images are under-exposed and some over-exposed), it might be that some of the images on your test strip look too light and some look too dark. Don’t worry about those for now, just make the best assessment of any good looking negs and use that time for the next test.
Making the full contact sheet
Once you have determined your exposure time using test strips, it’s time to make the full contact sheet!
- With the room lights off (only safelights on), place a full sheet of print paper in the centre of your enlarger baseboard and carefully arrange each of your negative strips in number order on the paper. A 10x8 sheet will just hold six strips of six 35mm negs.
- Cover carefully with the sheet of glass/acrylic and set the enlarger timer to the time you found from your test strips.
Expose the whole sheet for this time. - Process the sheet fully, wash for 2mins and dry.
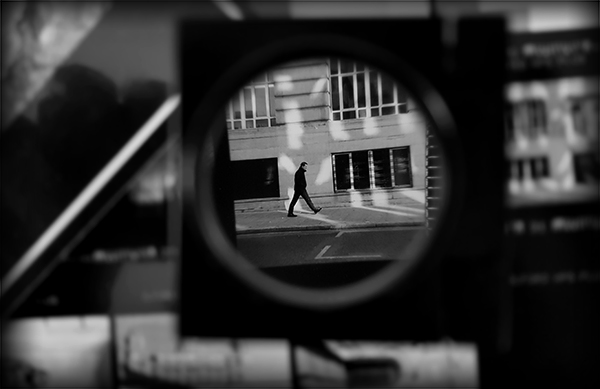
Now you can assess each of your images on the contact sheet to decide which to print and also how you might want to crop the image (many photographers use a marker to draw the cropping directly on the contact sheet).

The contact sheet image can also tell you if the image is over/under-exposed, and also give a clue as to whether it will require a different grade of contrast when printed; if the contact image is too soft, a higher contrast grade may be needed or, conversely, if too harsh/contrasty a softer grade may be required. Note: Any images on the contact sheet that are obviously too light or too dark will likely indicate over (image too light) or under (image too dark) exposure in the camera.
Congratulations you have your first contact sheet!
The next step on your creative journey is to print your selected negatives. Learn how to do this at: 'Making your first BW print'.