How to Process Black & White Film

The following practical procedure describes how to process black and white film.
You will need to mix chemicals to process your films so if you are new to mixing chemicals or are unsure about the procedure in any way please read my article How to mix chemicals before continuing.
Before you start...
Important: Loading film reels/spirals can be tricky at first until you have had some practice so I strongly advise you to obtain an old, outdated film to practice with in normal room light. Then practice with your eyes closed, and finally practice some more inside the changing bag. Tedious maybe but you will thank me later!
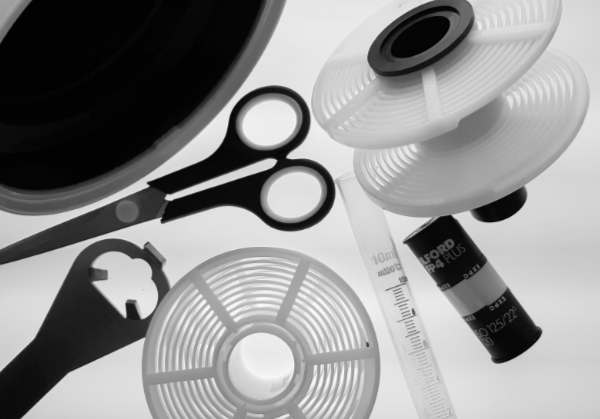
Equipment checklist to process black and white film
- Film developing tank (Paterson or AP are both good and metal tanks/reels are also good) with central column, film spool (reel), light seal lid, and cap
- 35mm film retriever or cassette opener tool (not necessary for 120 size film)
- Changing bag to load film (if you don’t have a completely darkened room)
- Scissors to cut film leader off and cut film off 35mm cassette
- Processing timer/clock
- Film clips to hang film to dry (or plastic clothes pegs)

Loading a black and white film using a changing bag
For 35mm steps 1 to 4 below can be done outside of the changing bag in normal room light. For 120 film start at Step 6. 120 users please note: do not unseal the roll until it is safe in the changing bag - it's all too easy to drop the roll after breaking the seal!
- Make sure the film reel and tank components are completely dry. This is very important since even the slightest bit of dampness on a plastic reel will swell the film and 'lock up' the spiral preventing you from loading the film onto it. A good precaution is to run a warm hair dryer over the reel for a minute or two before use or put the reel in a warm airing cupboard for a while prior to starting.
- If the 35mm film has been wound completely into the cassette, use the film retriever to get the film leader back out of the cassette.
- Cut the shaped film leader part off straight across the film between the first available sprocket holes (not through them).
- To help the film go into the reel easier, clip the sharp corners of the film at roughly 45 degrees. Make sure to cut between the sprocket holes and not through them.
- Pull approx. 3 to 4 inches (8cms) of the film from the cassette and load the start of the film into the film reel. Make sure the film goes past the small ball bearings in the reel so they ‘grip’ the film to prevent it coming back out.
- Place the film/reel into the changing bag together with the film tank, centre column, and light proof lid (the cap is not needed in the bag).
- Zip up the bag, put your arms through the ‘sleeves’ and make sure the arm holes are properly closed to prevent light entering.
- Gently wind your 35mm film on to the reel (slow and steady beats fast and furious!) pulling more film out of the cassette as needed. For 120 film, inside the closed bag run a fingernail across the tape seal to break it and carefully unwind the backing paper until you come to the start of the film. The film will be very curly so don't allow too much to unwind before you get it started on the reel. Insert the film into the reel and make sure both sides are on the first run of the reel and have past the ball bearings. Now gently twist the reel to load the film. The backing paper will naturally unravel as you do this.
- When you come to the end of the film, cut the film free with the scissors just where the tape holding the film starts (you will feel the tape holding the film to the cassette when you get to the end of the film).
- Still in the bag, put the reel onto the centre column then put the combo reel/column into the tank. Screw the lid on the tank making sure the lid ‘funnel’ goes into the column.
- You can now remove the loaded tank from the bag ready for processing. Remember to remove the empty film cassette and any ‘litter’ from the bag.
Changing bag tips
- Ideally you will be wearing long sleeves to prevent the changing bag ‘sleeves’ riding up and down as you load the film (it helps to wear a woollen jumper with sleeves as an extra block to the light, don't use bare arms!)
- The film reel entry should be kept at 12 o’clock. The film and film cassette should be facing you and the cassette dangling down a little from the reel
- Rotate the reel with both hands methodically. As the film cassette rides up and gets near the reel, pull it down again to reveal more film
Processing black and white film
There are six steps to developing black and white film:
- Pre-soak,
- Development,
- Stop,
- Fix,
- Wash,
- Drying.
The quantity of chemicals/liquid you need for each step is stated on the bottom of your film tank in ml (millilitres) or cc (cubic centimetre). They are effectively the same.
Choosing a developer- Use Ilford ID 11 for regular development when you have shot your film at box speed (the stated speed on the film box e.g. ISO 125 for Ilford FP4+). Use ID 11 for films rated between ISO 100 and 400.
- For fine grain films such as Ilford Pan F (ISO 50), or for films that have been rated at a lower ISO than their box speed (such as HP5 400 shot at ISO 200), use Ilford Perceptol. Perceptol has been designed to be used with fine grain films.
- If you want to ‘push’ your film and have rated it at a higher than ISO than box speed (i.e. you’ve shot Ilford HP5 or Kodak Tri-X 400 at ISO 800 or 1600), use Ilford Microphen. Microphen has been designed to keep the grain nice and sharp when over-development is required.
The development process
- Find out your development time from the makers development chart or use the free ‘Massive Dev Chart Timer’ app on your phone or tablet. Do this by selecting your film, the ISO, and the desired developer chemical name.
- Mix each of the chemicals (dev., stop, and fix) according to the manufacturer’s data. Diluting concentrated chemicals correctly and safely If you are new to mixing chemicals or are unsure about the procedure in any way please read my article How to mix chemicals before continuing. To work out the quantity needed for each solution refer to the developing tank manufacturer's information. Most plastic developing tanks have the quantities needed for each film size on the bottom of the tank so invert the tank to see how much is needed for your film size.
- Make sure all solutions (including water rinses) are at 20 degrees C as this is optimum. If necessary, you can adjust the stated time if the temperature is not 20 degrees C by using the Ilford time/temperature chart (although I do not recommend this, stick to 20 degrees C wherever possible). To test the temperature of a solution, use a clean thermometer placed in it. (Avoid cross-contamination by always cleaning the thermometer between solutions.)
- Whilst pouring the solutions into the tank, press the start button on your process timer or the start/continue button on the Massive Dev app if using your mobile/tablet.
- Start with the pre-soak for 1min. Once you have poured in the water, tap the side of the tank quite hard to dislodge any air bubbles that may be attached to the film in the reel then agitate for 30secs. Pour out the pre-soak water after 1min…
- Next, pour in the developer solution, tap the side of the tank firmly, and again agitate for 1min. Thereafter agitate for 10secs (4 gentle ’twisting’ inversions of the tank) in every minute. During the last 10secs of the time recommended by the developer manufacturer (or the Massive Dev Chart app time), pour out the developer. Note: Do not pour stop and fixer chemicals down the drain as they can be reused several times so always pour them back into their respective jug or container. Some developer solutions are 'one shot' and are discarded after one use but some, like ID 11 stock, can be reused by keeping a note of how many films have been processed and using the time adjustment/replenishment method recommended by the manufacturer. If you dilute ID11 stock with water it becomes 'one shot' so is discarded after each use (not the stock!).
- Quickly but smoothly, pour in the stop bath solution and again agitate gently for 1 minute then return the stop to it’s container.
- Pour in the fixer; agitate for one minute and then 10secs in every minute. At the end of the manufacturer's recommended fixing time (usually between 5-10mins), return the fixer to it’s container and pour in fresh water at 20 degrees C as a first rinse and to stop the fixing activity.
Washing, Drying, and Storing
- Wash the film with either gently running water for 10mins, or use the Ilford Wash Sequence (see below).
- Once the film is washed, open the tank and add the recommended quantity of Ilford Ilfotol wetting agent (3-4 drops). Gently rotate the reel and/or lift it up and down for 1 minute. Try not to create too much foam/bubbles.
- Remove the film from the reel and, using film clips or plastic clothes pegs, hang the film in a dust free place to dry (a dedicated drying cabinet is the ideal). Remove excess water from the film using a film squeegee device or use a very soft lint free absorbent cloth to gently run down the glossy side of the film only. It will take the film at least an hour to fully dry in a warm place.
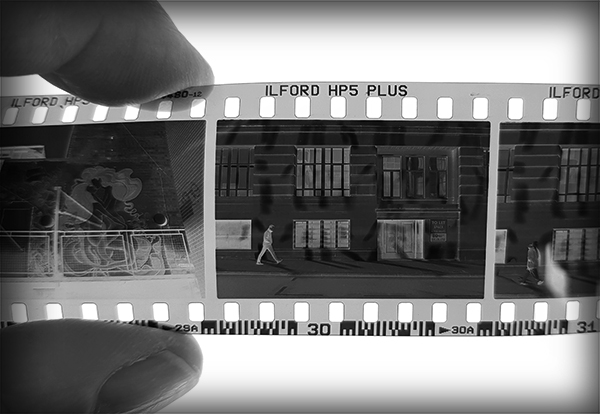
- Once the 35mm film is dry, cut it into strips of 6 negs (never cut the film into individual negatives!) For 120 films how many negs you have on each strip will depend on the image format. For example, 6x6sq negs can be cut into strips of three, whereas 6x7 negs will need to be in strips of two to fit standard negative storage sleeves.
- Store the negative strips in proper negative storage sheets and binders/boxes.
That's it! Easy!
If all went well, you will have successfully developed your first black and white film. The next stage on your creative journey is to make a contact sheet of the entire roll ready to choose the images you will want to print (next steps see How to make a Contact Sheet and also 'Making your first BW print').
Ilford Wash Sequence
To save water, and speed up the washing process, Ilford recommend the following washing sequence:
- After fixing, fill the spiral tank with water at the same temperature, +/- 5ºC (9ºF), as the processing solutions. Invert the tank 5 times.
- Drain the water away and refill. Invert the tank 10 times.
- Once more, drain the water. Invert the tank 20 times and drain the water away.
- Finally rinse with a few drops of ILFORD ILFOTOL Wetting Agent (1:200) added to the rinse water.